
Initial Setup
You've taken the most important step in your journey.
The first one.
As much as we all wish we could just snap our fingers and be on our way to new business growth, that's not reality. Taking advantage of all of the great capabilities of this platform is going to take some time.
And as a business owner, you've already got a lot on your plate, so we've broken the process down into small chunks that you should be able to do in about 20 minutes a day. By devoting a few minutes a day to your marketing automation efforts, it should be less onerous.
In this first module, we're going to focus on initial setup. In later modules, we'll take you through some critical thinking about your business and brand, how to translate that into the words you put on your website and funnels (aka "copy"), how to create offers that drive interest, and how to nurture that interest into new business.
Our #1 goal is to get you to a place by the time your 30 day trial ends where your marketing engine is a well oiled machine requiring little additional development so you can focus on what's most important...all of your new customers!
Step 1: Logging In
Once you sign up for your risk-free 30 day trial, it's time to log into your account for the first time!
Here's a step-by-step on how to get logged in:
Check your email (Promotions and Updates Folders for an email with the subject "Activate Your Account | NoCoBizHub"
Clicking the login button will take you to a page that prompts you to to create a new password.
Once you've entered your password, you'll be logged into the system.
Feel free to bookmark the page for https://app.nocobizhub.com, or you can always come back to www.nocobizhub.com and use the login button in the top menu.
If you do not see it, please send a message to support immediately. It probably means you entered your email wrong during checkout.
Step 2: A note about Passwords
DO NOT lose your password! But we get it, it happens. Here's some password best practices:
If you reset your password (because you forgot), check your spam! Even though the first email from our platform shouldn't end up in spam, it may still end up there on some email platforms.
If the system asks to send you a verification code, select the phone number option. This is usually much faster than using email and is good to have this second authentication method in case your email gets hacked in the future.
If you can't find anything, please email [email protected] or open a support ticket through the support menu item under Helpdesk in the top menu bar of our website.
Step 3: Input Business Profile info
Now that you're logged into the app, it's time to start setting up your business hub!
Upon first login, the first screen you will see is the Launchpad. The Launchpad will prompt you to complete a number of important integrations, which we'll get to later. The first thing we're going to do is look for the settings button in the lower left side of the side-menu, and click that.
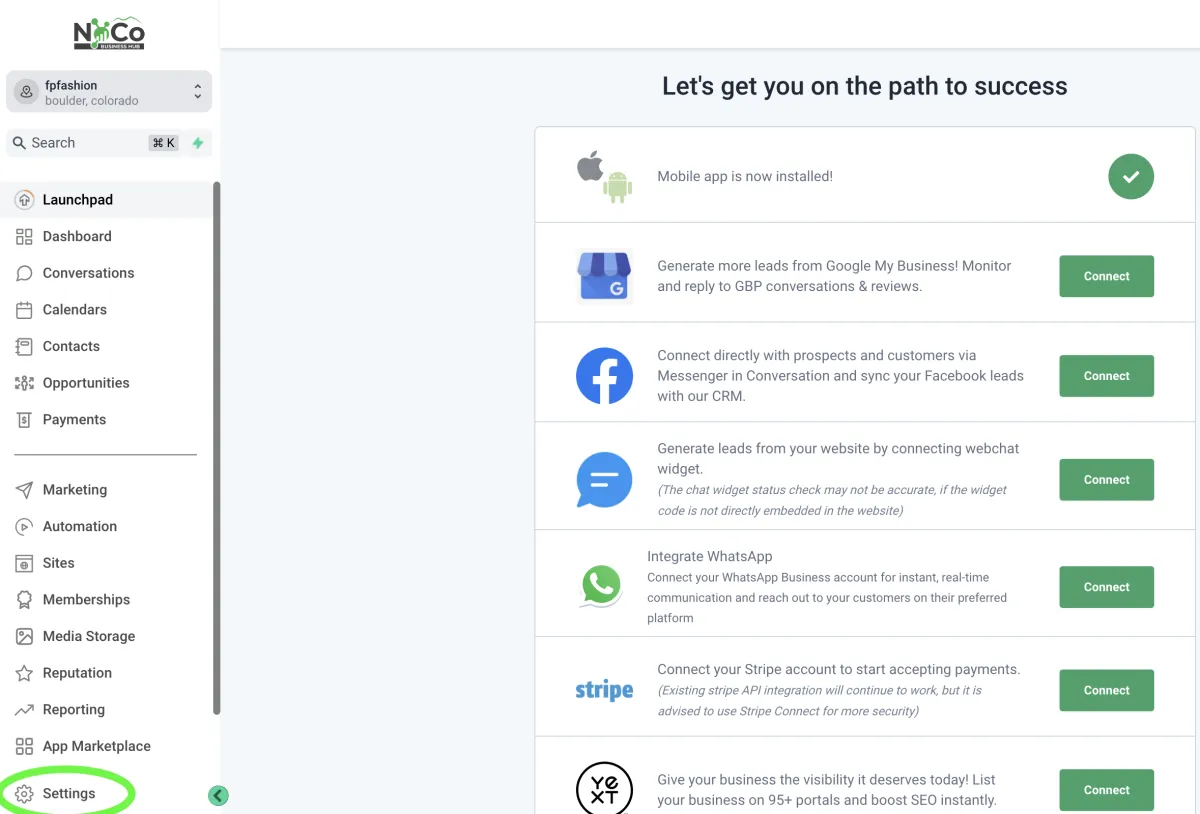
This next set of screens is where we are going to focus most of our time on your first day in the system.
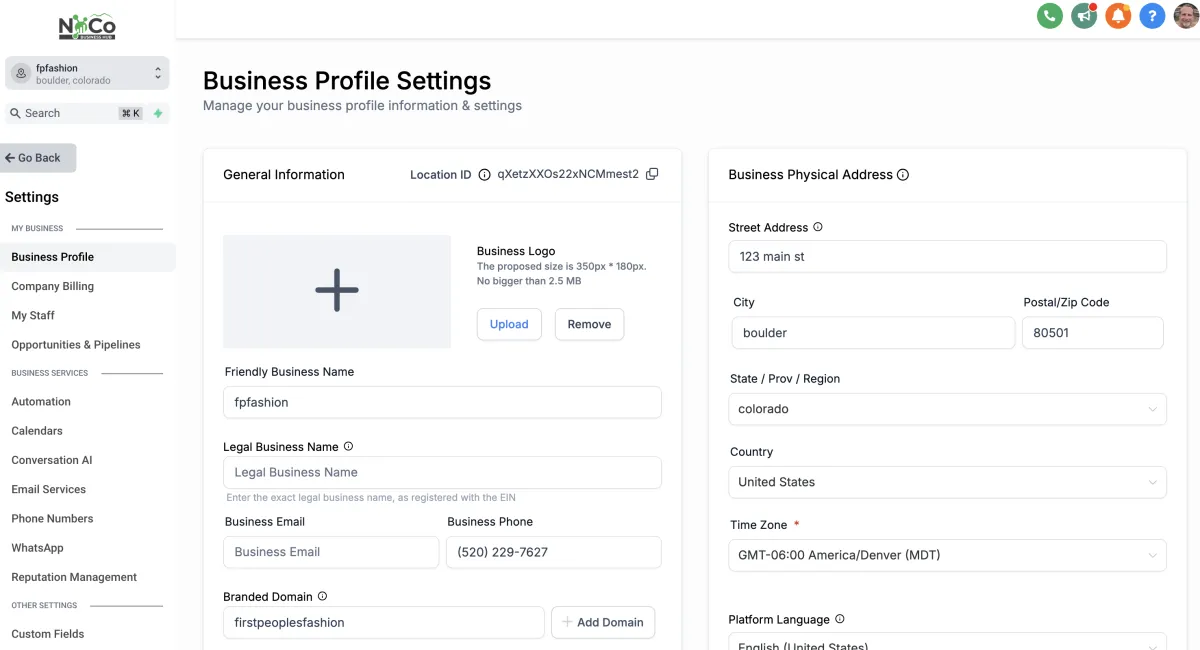
You will land on the Business Profile tab, and we want to get that filled out as completely as possible.
Upload the logo for your business
Friendly business name (e.g. your "doing business as", or registered DBA)
Add your legal business name (Your name, if a sole proprietor, or your corporation name)
Official business email (separate for your personal email, if you have one)
Business Phone (we're going to get you a new phone number in a later step, but input your current one for now)
This requires you set up a CNAME in your DNS. Skip for now and we will walk you though this later.
Business Website (if you have one already. If not, we'll guide you through making one later)
Business Niche - tell us what kind of business you have
Be sure to click the "update" button in the lower right hand side of the section when you have filled out all of the information.
Business Physical Address (self explanatory). Click the update button within the Physical Address box after completing this section.
Fill out the "Authorized Representative" section. This is most likely you, but if you are setting this up for your boss, it may be their information. Hit the update button within the section when complete.
Fill out the "Business Information" section and then...you guessed it...hit the update buttin within the section when complete.
Leave all the other settings at their defaults for now
Step 4: Let us know when you have completed this step
To help speed up later steps, we have a plethora of templates available with sample websites, funnels, custom fields and values. We'll explain all of this later, but to help us load a set of templates into your account that will give you the right starting point, you'll need to tell us a little bit about what exactly your business does.
The contact information below is required to ensure that we can match your submission to the correct account. Don't worry if the theme isn't an exact match, customizing the information is pretty easy.

Step 5: Set up Personal info and email
Now we will take some easy steps to get some integrations set up
Now that we've filled out some business information, go to the Personal Info tab. This is where you will put information specific to you.
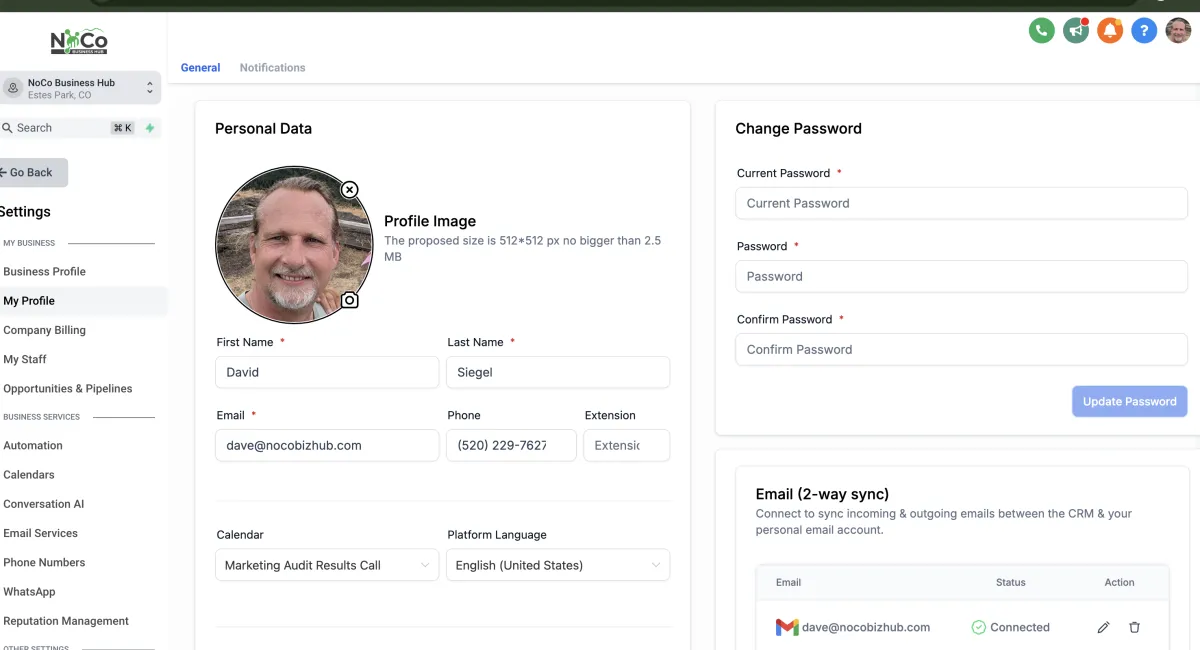
Fill in the information in each section as before, hitting the update in each box/section before you move on to the next.
Personal Data
Email (2-way) sync:
This is where you link the system with your unique business email address. This connection will allow you to send email from this account from directly within the system so that these emails will show up in your CRM (more on that later). You will be prompted to enter your login information for your email
Add a custom signature for outbound emails that you send through our system
Calendar settings - same as email. If you will use the system to enable online bookings, this will sync your availability with the calendars you link it to
Note the additional tab in this section for video conferencing. If you have a zoom account, connect it here so that scheduled meetings have a zoom link in them.
Set your "office hours" for meetings. Any time outside these times will not show as available for you.
Scroll back up to the top of the page with your personal information. You'll see a label to the right of "General" called Notifications. In this section, you can configure a number of preferences on how you will be notified of various events.
Hurray! You've completed todays tasks.
You've just completed the Day 1 activities and taken your first steps.
In addition to these tutorials, here are a number of additional resources that you have available to you.
Searchable Help Docs: Search through our help docs full of video tutorials & step by step instructions Access Them Here
NoCoBizHub User Community: Ask a question in the community and get answers from people just like you. Often, the community is the most creative with solutions. Access It Here.
Submit A Ticket: Got something unique? Head over to the Help Desk & Submit a ticket.
Email Support: We also do accept emails the old fashioned way. Email [email protected]
Pick this back up tomorrow, or if you want to keep going today...
Privacy | Terms | Software Login | Helpdesk
© 2024 Siegel Group LLC d.b.a. NoCoBizHub All Rights Reserved